If you’re anything like me, you NEED to keep track of your rides. Whether it’s for training or pleasure, it’s fun to follow your progress and relive your adventures!
Collecting and using ride data has never been easier. The ways to collect this information is as varied as the ways you can use it – that is to say it’s virtually limitless.
I have classified available ride data tools into two main categories: Planning rides and recording rides.
A little disclaimer here…
The views presented here are largely my own. I’m profiling apps and devices that I find useful, but that doesn’t mean that there aren’t other ones out there that may fit your needs better. Always research and ask questions before you pay for something.
Planning tools are the apps you use to prepare for your rides and workouts. They involve mapping routes, setting goals, and dealing with other aspects of preparing for your ride.
Recording tools, both hardware and software based, include the devices and utilities that you might use while you are riding. They track your route, progress, and health stats.
They can also do things like show you real-time data, notify you if you exceed pre-specified physical or terrain-based limits, or call the first responders if your ride ends up not going so well.
There are literally hundreds of cycling apps available to assist you with your rides and training. When I set out to deliver a video on the topic of ride planning, training tools, and the world of GPS, I had no idea just how deep the rabbit hole really goes.
I found too much to work with. Sure, there are lots of common apps that you have heard of. Strava, RideWith GPS, Trailforks, Zwift, and so many others have made it into the mainstream lexicon of the riding world.
But the number of lesser-known utilities is overwhelming. Some are simple mapping programs while others are designed to pair with specific pieces of equipment or training gear.
But this is just the beginning of what these apps are capable of. Let’s dive deeper and find out more about how they work.
What is data?
Data is raw information. It’s the numbers and metrics that are collected at the time of the activity, before any of it is reviewed or processed.
It’s what happens to the data after it is collected that really matters.

The simplest form of data usage is simple archiving. Storing the ride information for later recall and possible use in other scenarios.
The places where the raw data gets used the most is training. Regardless of whether the intended use is for personal fitness, trip planning, off-season health maintenance, or competition, the utility of this information cannot be understated.
Let’s say you are taking a trip to Nepal to ride the trails in the Himalayas. That’s some pretty high-elevation stuff!
To accomplish this effectively, you will need to know what you are currently capable of, as well as how much you need to improve in order to participate in such a major adventure without placing yourself at risk of any number of health-related issues or injuries.
Let’s say you signed up for your first Ironman. Swimming 2.4 miles, cycling 112 miles, and running a full marathon is a major undertaking! You need to know how to train effectively and work your way up to the event day.
All of these situations benefit tremendously from data that can be collected using a variety of apps and equipment.
They often dovetail into specific training plans or workout regimens that can be self-managed or referenced by professional coaches.
Having supporting data during your workouts only helps to effectively meet your goals.
Planning Your Ride
Where are you going to go? Do you know yet? Is there a particular ride you need to take? Climbing? Intervals? Distance?
If you have a riding agenda, then this all needs to be laid out.
There are dozens of apps that can help you plan a route and meet your training needs – if you have any. I’ll quickly profile a few candidates.
Strava
Yes, Strava is possibly the biggest name in online ride data, and it is also the current dirty word in fitness apps.
They have, until recently, maintained a tool for recording and storing data that is free to use if you stick to the basic plan. Friends can ride road and trail segments and compare and compete against each other based on their best results.
But Strava caught a pretty bad reputation recently when they decided to shut down the ability for viewers of any third party platform, except the individual user’s account, to see their data. This is often data that wasn’t captured from Strava, but that merely passed through Strava’s channels on its way to other apps.
This closed off a lot of great training connections that benefitted athletes and made it impossible for many training apps to continue providing services that were used by their client base.
It has also been harshly criticized for its route planning tools. A lot of people really don’t think they are the best.
Personally, I think the social aspect of the Strava universe, the one that lets users compete for supremacy over ride segments, adds some competition and fun for those who are into that sort of thing.
Strava also allows users to record right from its app. I don’t think this is the best way to record since your phone is usually in your pocket, making GPS that much less accurate, and dedicated GPS devices typically record better tracks, but it is still handy if you don’t have another option for whatever reason.
Route Planning using Strava’s tools is pretty simple.
The phone app uses this odd pencil tool. You click and drag on the screen in the general area where you want your route to go. It estimates a route based on the line you drew. I guess this is helpful if you already know the area where you plan to ride?
Personally, I don’t see the effectiveness of this method.
Ride With GPS
This app is probably your best option for planning rides. It has an easy to learn and easy to use interface for navigating routes along roads and trails. It also has planning, scheduling, and communication tools for group rides.
I’m fairly new to this tool and I have been nothing but impressed. The website is well laid out and logical. The tools are fairly intuitive and they really don’t mess up the path very often.
They find good routes!
Ride With GPS is a great tool for routing road and mountain paths. It has a wonderfully efficient design and its maps can be tagged with turn by turn directions and points of interest. Its integration of heat mapping tools, available for paid subscribers, is a great way to find popular and safe routes in areas that you are unfamiliar with.
In terms of route planning, this may be my new favorite!
Komoot
Pronounced “Commut”, this app is named after a word in the Waiser dialect and it means “simple and practical”. No, it isn’t a catchy spelling of “commute”, although that kinda works.
Komoot has some great tools for planning rides. It works a lot like RideWith GPS in that the route planning features involve placing points and dragging the resulting paths to generate the route. It’s pretty intuitive.
But this system is somewhat euro-centric. I haven’t experienced it first-hand, but I have read that the routing functions are a bit better in Europe. This is probably due to those maps being more mature and developed.
One thing I noticed was, when I was creating a route on my local trails, the routing engine wanted to put me on a singletrack that is a pretty difficult ride, and in the wrong direction. I had to manually correct the route.
This could have been bad if I didn’t know the trail system and was relying on Komoot to plan safe passage.
There are a few off-road tools for developing routes. I looked at the two dominant websites to see which has better tools.
MTB Project
MTB Project is a very popular website for mountain bikers to find trails and develop a gameplan for a ride. Their trail systems are fairly mature and the trail stats and reviews are solid. They also provide some tools for creating routes.
I must say, I’m not very impressed with their tool set. A link to the page for adding routes is on the home page, but you have to look for it. It is not displayed very obviously and you might miss it.
Once you are in the tool, it doesn’t auto-map onto existing trails. You need to use their vector tool to click onto every little part of the trail one little bit at a time.
Are you kidding me?
This is not a good way to create mountain bike routes. In fact, it’s pretty bad. But you can always upload a GPX of a previous ride to use as a route.
But that defeats the purpose of creating something new, doesn’t it?
Trailforks
Trailforks was created in 2010 as a Facebook app called “Ridelog”. It quickly gained popularity and launched as its own website two years later.
Over the years, the trail database at Trailforks grew and evolved. It integrated other trail databases, got acquired by Pinkbike and then Outside, Inc., and developed a robust user-supported system.
The Trailforks routing system is capable, but it isn’t perfect.
Developing routes is accomplished by first choosing between “official” local routes which are displayed on the website for the world to see and use, or “Ride Plans” which are kept as part of your personal account and are sharable, but not made public.
Either way, you can develop a route by using their interface to click on trails and building your route trail by trail. You can add paths one by one until you have a route plan, at which time you can review things like elevation plans and mileage.
You can then view your completed route in the Trailforks app, or export it as a GPX, FIT file, or KML, where you can use it in other apps on your bike computer or watch.
There are a lot of options out in the wild. Generally speaking, you need a device to do the recording, and sometimes another device to process and post the information to a place where it gets archived and referenced.
The data is most often posted online so you can review your route and stats for and track changes or improvement.
The captured data uses concepts like FTP to illustrate the development of training regimens and building fitness charts.
These are questions that can be answered by referencing ride data that has been posted for review.
Devices
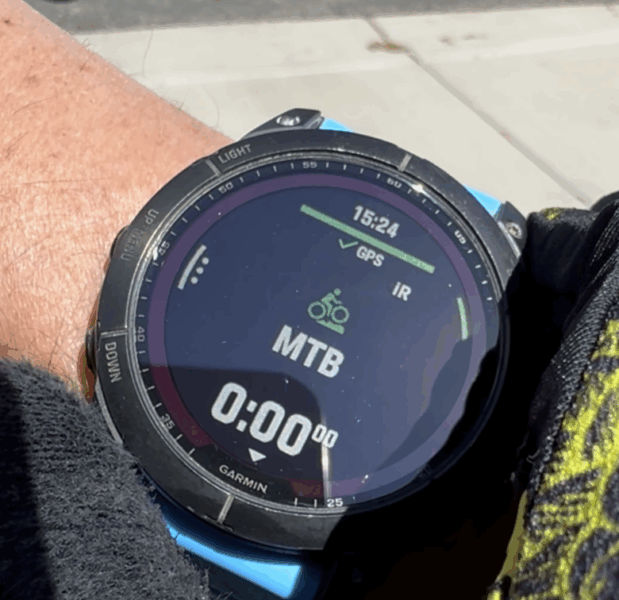
I own a Garmin Fenix 7X Solar. This is my primary device for capturing ride data, but I have a few others I can use as backups or in a pinch.
My secondary device is a Garmin Edge 840. I had an Edge 1000, but I lost it a few years ago on a ride and I replaced it with this thing.
I also use an Apple Watch Ultra 2. This device is capable, and the interface is amazing, but it doesn’t work well with existing routing tools and websites, so I usually use it as a daily monitor and I switch to my Garmin when I go on a ride.
Oh, and I also carry a Garmin InReach. This is a small device that talks to satellites and can send your location and other data to rescue teams. It’s the go-to device if you are going to be traveling in areas that don’t have cellular or other signal access.
If I forget both of my devices, or if they are out of power (it happens), I use my iPhone. I typically don’t take extended rides, so the phone holds up pretty well, all things considered.
I primarily ride trails, but the same rules apply if you ride roads.
The first thing I do is make sure my device is properly receiving signal from the GPS satellites, and data from any devices I may have paired. These can include heart rate monitors, power meters, or shifting systems.
Then I press the start button and begin my ride.
While riding, I can access various data points and assess my progress. I can check my distance traveled, current speed, elevation, amount of climbing and descending, average speed, and a whole lot of other things. I can also configure my device to show any of these items on my screen real-time.
I’ll often find myself using my Garmin to figure out where I am on a trail, how much is left, or if I have time to add another trail before I need to be back at the vehicle.
If I have gone to the effort of loading a predetermined route on the device, then my options expand. I am able to track my progress along the route, get turn-by-turn directions, and even race against myself if I have ridden this route in the past.
At the end of the ride, I stop the data recording, save the ride, and sync the device with my phone.
There are many ways to do this, but in my case the Garmin Connect app is my buddy.
The data uploads, and trickles into the apps that I have connected to Garmin; in this case, Trailforks.
I can open the trailforks app and edit ride statistics. I can add a title to the ride, make sure the bike I used is correct, adjust privacy settings, add friends I rode with, and add trail reports to help other riders that may want to use those trails in the future.
If the ride data is correct, Trailforks has a cool feature that keeps track of the number of miles on my bike and reminds me to stay up to date on maintenance and repairs. Pretty handy!
Other apps that are more training focused can use this ride data to extrapolate progress and use it to build training plans.
There are many positive social aspects of ride publishing that promote and perpetuate community participation and advancement.
Indoor Data
Zwift is an indoor training platform that uses a video game styled world to generate rides using your bike trainer. (It also has a running mode). It has some great group ride and virtual racing features. They do a pretty good job of recreating race settings and the large group mentality.
During my first Zwift race, I was actually pretty nervous at the start. Just like I felt at the starting line during my racing days!
Zwift is probably the top choice if you want your indoor training experience to be more social. You can literally see the other riders that are around you and, in a general sense, interact with them through chats or by giving a quick “thumbs up”.
It’s fun and interactive, but it also gets tricky when you are on a hard climb!
TrainerRoad, another indoor training app, allows members to connect to outdoor rides. It uses AI to generate an adaptive training system that is based on a rider’s history and details like goals, progress, power zones, and other factors.
This app is based on the concept that a science-based structured approach to training will maximize speed and performance. They are trying to use data to take the guesswork out of the training equation.
The main criticism is that the app lacks a friendly graphical interface. Instead, it displays raw workout data and helps the rider stay focused by offering small bits of information at the bottom of the screen.
It offers a variety of top-level training tools like their popular podcast. And for paying members they offer integration with external fitness hardware, use of their “RLGL” calendar tool, and interaction with virtual coaches.
If you link TrainerRoad to other data recording apps, it can pull your outdoor ride data and use it, along with what they call “machine learning”, to build cohesive workout plans. These plans can be used to achieve goals like riding a century, reaching a particular FTP, or competing in a race.
Security
Are there elements of recording and publishing data that concern some people? Definitely.
How much public data is too much public data?
Garmin, a leader in GPS and health data recording, has a partnership program for health insurance companies that lets them add Garmin wearables to their plans as an incentive for their users to live healthier lifestyles.
But this includes sharing personal data with the insurance company. That really doesn’t sit well with a lot of people.
Although this specific program requires the customer to opt-in, it could be the start of a slippery slope, possibly leading to more open sharing of aggregate personal data with insurers. And that can lead to situations where those insurers raise premiums based on whether they think you are healthy “enough”.
Then there’s the issue of personal privacy. If your ride data is published to a public forum, then how can your location be kept confidential?
Most ride apps and services offer a feature which allows you to set your rides to not show the route path until a certain minimum distance from a chosen start point. (Usually your home). This makes it tougher for malicious parties to figure out exactly where you live.
Many sites also allow you to decide what specific elements of your personal data make it into the public spotlight. For example, if you don’t want your heart rate data to be made public, some sites allow you to specifically block that data.
Ultimately, it’s up to you to research the services you choose to use and pay for. While most have safety features, there are a few that are… pretty basic.
The pricing for these services varies wildly.
Tips
Turn on your device a few minutes before you start recording your ride. GPS is pretty quick these days, but it still takes a bit to find the satellites and acquire a signal.
I like to use adapters to hook my workout screen up to a TV. This makes indoor winter training a bit more fun and easier to see.
Capturing ride data and using it effectively can be as easy, or as hard, as you want it to be. There are some pretty fancy devices to help you out on your rides.
You can pay thousands for the latest tech, or you can just use your smartphone.
And depending on how much work you put into it, that data can be used pretty effectively to help achieve a wide variety of goals. From training, to tracking, to bragging, being able to track your progress over time is fun and helpful.