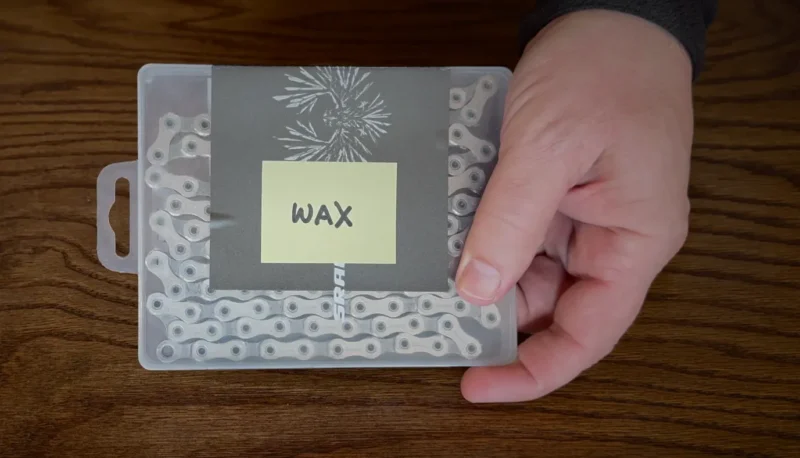
We have all lubricated a chain, right? But have you waxed a chain? Well, today is the day you find out if you’re an anti-waxer.
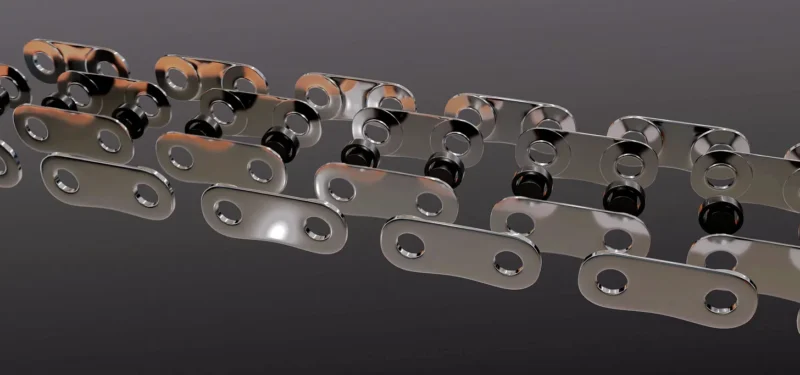
The bike chain is a primary part of the bicycle drivetrain. It connects the gears and carries the energy of your pedal stroke from the cranks to the rear wheel.
The chain is probably the piece of your bike that contains the second largest number of overall parts, after the rear wheel. It isn’t the most complicated, but it isn’t so simple either. Your bike chain contains hundreds of metal bits that spend all their time rubbing against each other.
To ensure long life, low wear, and that they work together smoothly, those parts need to be lubricated and kept clean.
Proper lubrication helps the parts wear more slowly and also allows them to work quietly.
After all, metal on metal can get pretty noisy.
Keeping the chain clean keeps foreign material, like sand, dirt, or other bits out. If they get in there and stay there for too long, they can wear down the chain. This can open up spaces that are supposed to be small and make room for even more gunk, accelerating the process.
Sticky or oily lubrication products can attract all kinds of gunk. Riding in dusty or dirty conditions (which is what mountain biking is all about) causes lots of dirt to get thrown into the drivetrain. We want a good way to keep that dirt from hanging around.
Sure, following the directions and lubricating a chain with products that evaporate prior to use is a great way to prolong your chain’s life. But wouldn’t it be great if there was a product that wasn’t so sticky, so the dirt wouldn’t be an issue in the first place?
Well, that’s where wax comes in.
There are many ways to properly wax a chain. The process shown here uses basic materials and excludes kits that are marketed by some companies. This article does not expressly endorse or oppose any kit, we are just trying to show the details of the process.
Why wax a chain?
Waxing a chain is not less work than using regular lube. In fact, if you count the initial waxing process, it’s a bit more work.
The best part of waxing is chain life. Since chain wear is mostly caused by contaminants getting into the links, waxing extends the life of the chain in two ways:
- It fills the spaces inside the chain where those contaminants want to be
- It keeps the stuff from sticking to the chain in the first place.
Is it worth it to wax?
A lot of people think so. Having a long lasting chain is a great thing if you ride extended distances, ride in dusty areas, or if you just don’t like replacing your chain very often.
Chains are expensive! Depending on what chain you use and how often you ride, waxing equipment can pay for itself inside of the first year.
It’s not as simple as just dunking a chain into hot wax. There’s more to it than that.
Here’s what you will need to effectively wax your chain. I keep my kit in a bin under my workbench.
The hot plate.
This is used to provide the heat. Get one that has variable heat settings. It doesn’t need to go above 200ºf (93ºc).
The pot
I bought a cheap stainless pot online. This one was less than $20. It has cladding, which ensures even heat. This one was measured to fit the burner on the hot plate and also has this cool steam vent hole. More on that later…
The wax.
I’m using basic paraffin wax; the stuff that you would use to make candles at home. It is easy to find at a hardware store and it’s relatively cheap compared to the specialty chain waxes you see for sale.
Aside from a few additives, this is the exact same stuff as those fancy chain wax products.
Wax is available in blocks or beads. It probably doesn’t matter which you use, since you would be breaking up the blocks to melt them anyway. Just go with one that doesn’t have additives and fits your budget.
The hanger.
This is used to hang and dip the chain. It keeps your fingers out of the hot wax and gives you an easy way to hang the chain when it’s time for it to drip and cool off.
Glass Jars.
These hold the various solvents used in chain cleaning. Some of those solvents can be corrosive, so make sure you get glass jars. I like the transparency so I can see how well the cleaners are doing their job.
Remember, volatile liquids like kerosene, alcohols, and many solvents must be stored in their appropriate containers, usually metal.
Solvents.
I use degreaser, mineral spirits and denatured alcohol to clean the chain.
Lubricants.
These are designed to refresh the chain after you wax it, a lot like regular chain lube. Be sure to use a lube that is designed for use on a waxed chain. Using oily or solvent-based lubes will damage the wax, require more cleaning, and attract dirt.
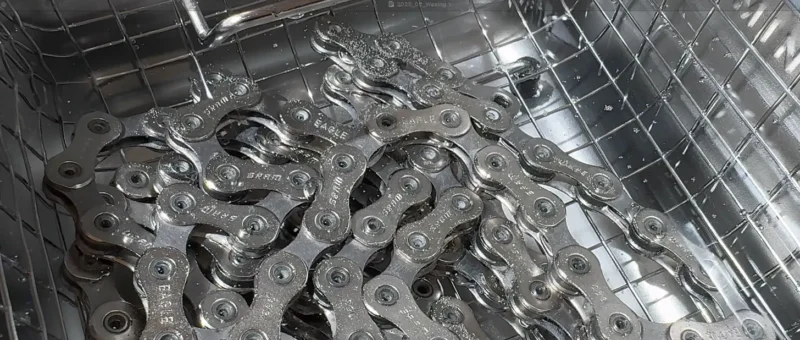
The Ultrasonic Cleaner.
There are few things that do a better job of coaxing the dirt out of a grimy chain. Useful in a variety of applications, this is a must-have if you want to start with a used chain.
The essential parts of this system cost about the same as a chain waxing kit from leading manufacturers. I feel like this setup has an added benefit of being useful with more parts and in more situations than just this one.
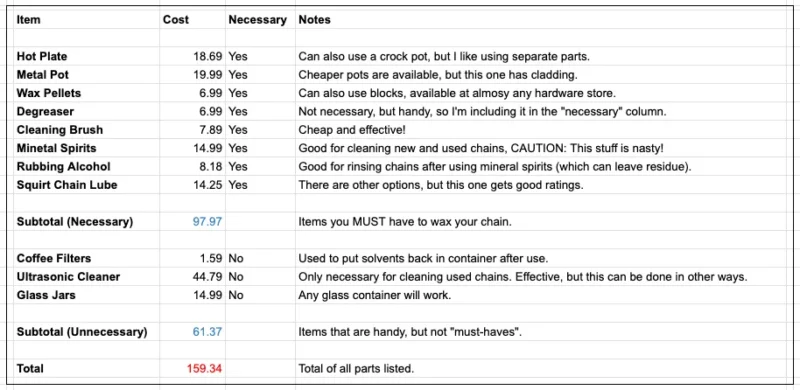
NOTE: The list of parts included with this kit include an ultrasonic cleaner. Commercial kits do not include this part and still cost a lot more!
Preparing the Chain
The most important first step of waxing is starting with a clean chain. Any residual material that may be hiding inside the links will prevent the wax from properly penetrating into the places it needs to be in order to be most effective.
New chain prep and used chain prep have a lot in common but should be approached in slightly different ways.
New chains usually ship covered with a greasy substance that’s there to prevent rust during transport. It’s not lube. Sure, you could throw that thing on the bike and ride – and it might just work for a while – but it won’t be long before it gets all gunked up.
It’s super sticky.
Previously used chains need to be measured for wear before anything else is done to them. There are plenty of tools for measuring these, but I prefer the three point tools as they can be used on a wider variety of chain types.
Be sure to subscribe to the channel and you will be alerted when we release our video on measuring chain wear and stretch. It will appear in the description below.
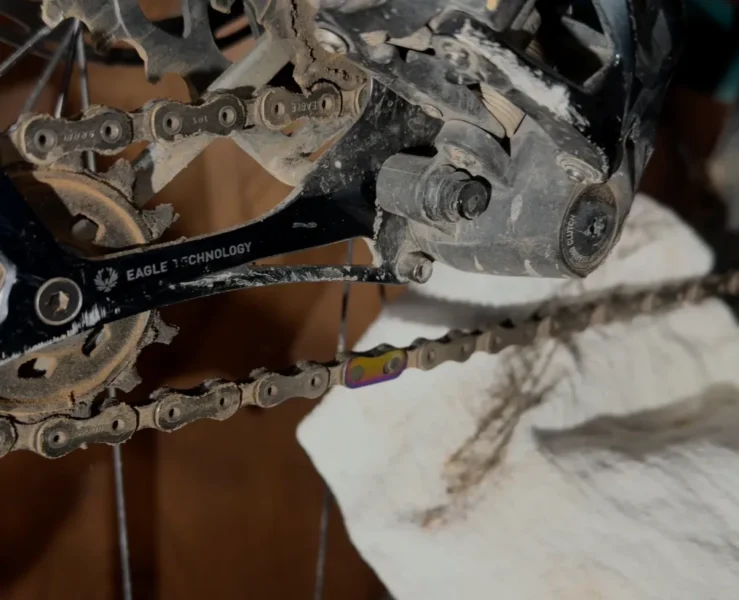
Remember to also clean up any other parts of the drivetrain that contact the chain directly. This includes the rear derailleur jockey wheels, the rear cogs, and the front chainrings.
Cleaning off the shipping grease, road or trail dirt, or existing lube is the first step in preparing a chain for wax. This can be accomplished by using a degreaser or stripper.
I have seen people use gasoline as a solvent in this scenario, and it works well.
PLEASE remember that this process involves flammable substances.
Along with the use of solvents, overheating wax can create flammable vapors.
Review and follow necessary safety procedures for the materials you use.
Make sure you operate at safe temperatures, wear protective equipment,
and work in a well ventilated space away from open flame.
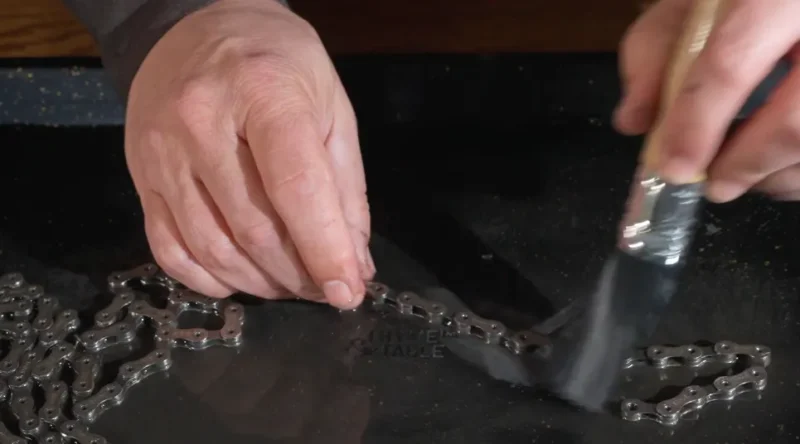
You can use a nylon brush, safe when used with solvents, to scrub the exterior grime off the chain while it soaks. It may need to sit a while to fully penetrate. We’re talking hours, not minutes.
Now it’s time to get to work on the inner bits.
Any residual dirt or grease that remains inside will keep the wax from making its way into the inner parts of the chain.
I use an ultrasonic cleaner to get deep into the chain. Many people consider this to be the best way to really get in there and release the worst of the dirt. They aren’t super expensive, this one was about $45, and they make a big difference in their ability to penetrate in between the links.
You can leave the chain in the cleaner for a while if necessary. Ultrasonic cleaners are designed to use water as their solvent, so feel free to change out the liquid if you want to gauge the progress of the cleaning. If more dirt comes out, then it’s not done yet!
After the chain is clean, I like to give it a rinse in a jar of denatured alcohol. This step isn’t necessary, but it gives me peace of mind that I am starting with a completely bare chain.
Some people dry the chain with a blast of compressed air, but I let it lie out in the sun to dry.
After cleaning the chain, you can pour the solvents back into their container using a coffee filter. Your solvent will be ready for its next use, but without all the grit left over from your last cleaning.
Lay your chain out on a flat surface and fold it back and forth, doubling it back upon itself so it takes up a less space. It should be roughly square when you are done.
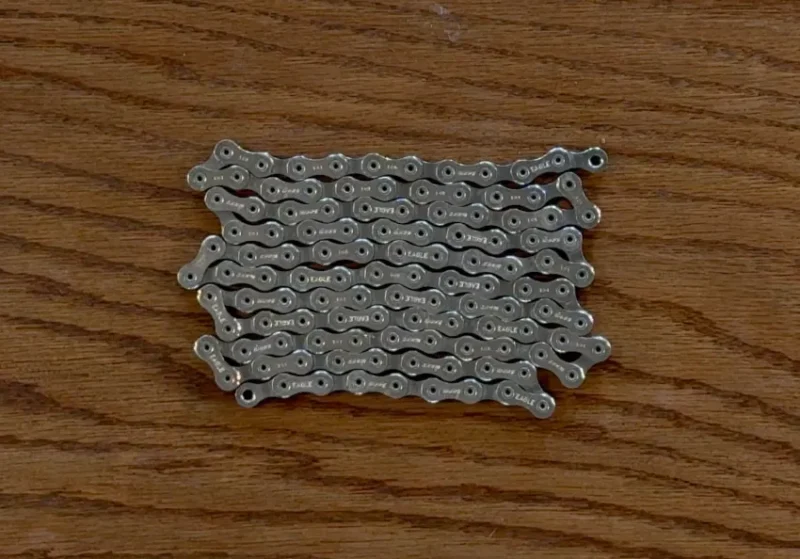
Keep in mind that the point here is for it to lay flat in the pot. It should be a rough size and shape that will facilitate that.
Thread your wire through the chain, running it inside the links. It should run in between the link plates and you should be able to pick up the chain, keeping the folded shape, when you are done.
Set your hotplate to about 150ºf (66ºc) and add your wax. You will want to add enough wax so that the chain can be completely submerged. This is usually about one and a half chain links deep.
This is when you would want to include your additives. The preferred options are tungsten disulfide (PAUSE) or PTFE, a teflon powder. You can use both if you like.
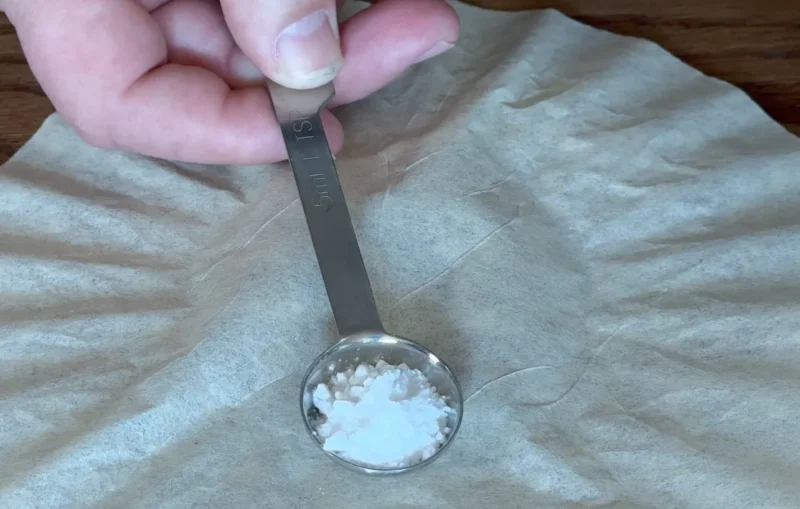
Typical practice is to add about ten grams, or just a tiny bit more than one teaspoon’s worth. If you use both additives, use ten grams of each.
You don’t need to heat the wax much beyond that. Going higher may penetrate the links a bit better, but it will leave less of a finish when you’re done, since the wax drips off while it cools.
Wax melts at just under 100ºf (38ºc). It becomes flammable at almost 400ºf (204ºc). The burner should never get anywhere near this hot when melting the wax!
Waxing the Chain
Immerse the chain in the wax. Lay it down and make sure it is fully submerged.
Should you wax the master link? A lot of people will say no, because it might be difficult to install with a thicker layer of wax on it. I’m going to throw one in and give it a try. The worst that will happen is I’ll need to use a clean one at the end of the process.
Shimano chains ship with their master link in a little plastic baggie. SRAM throws theirs in with the rest of the sticky mess.
Stay tuned to see the results!
Let the chain sit for about ten or fifteen minutes. Some people like to “stir” it a bit, moving the chain in the liquid so that the wax soaks deeper into the links.
A common practice is to look for bubbles. As the wax enters the links, it displaces air that bubbles out. When the bubbles are gone, the wax has soaked as far into the chain as it can go.
Once the chain has sat long enough, lift it out of the pot. Hang it up to cool. I prefer to hang it over the pot so it drips back into the melted wax.

Turn off the heat and let it cool for five to ten minutes. After it is cool enough to handle you will notice a layer of wax caked onto the chain. You can remove the chain from the wire and straighten it out.
The cool wax is far stiffer than any liquid lube you would normally add to the chain. We need to remove the excess wax from the outside of the chain so that it is left with a thin layer.
It’s best to run the chain around a rounded metal rod to shed the majority of the wax off the surface. This opens up the links and gets them worked in just a bit.

After the melt, you can store the hardened wax in a baggie and re-melt it for next time. I like to scrape the bottom just a bit to remove any impurities that may have accumulated during the process.
Super simple!
Chain installation should be only a little bit stiffer than what you’re used to.
The first few minutes of riding will feel sluggish. Breaking the residual wax free will be chunky and slow. But it only has to happen once.
For me, it was less than ten minutes of pedaling.
After the wax is worked out of the inner parts of the chain and the only thing left is a thin film, the feel of your pedal stroke will be back to normal and you will be on your way!
The amount of dirt that you will find on your chain after a dusty ride is guaranteed to be a lot lower. Your chain will run nice and smooth, but it won’t attract the gunk!
When the dirt gets kicked up onto the chain, it just falls off again. There’s nothing for it to stick to!
If you see dirt on your chain after a ride, just give the chain a whack and almost all of it should fall right off.
You won’t need to re-wax the chain for several thousand miles (1000 miles = about 1600 km). Some say 3,000, some say 5,000. I say keep an eye on your chain and act accordingly. If the chain starts to make noise then maybe it is time for some tender loving care.
The good news is, now that you have already waxed your chain, you only need to re-dip it, soak, and dry. No need to strip off the old material with solvents!
A ‘drip wax” lube is recommended for use after waxing a chain. Using a regular oil or solvent-based lubrication will degrade the wax and you will need to re-strip the chain next time you wax it.
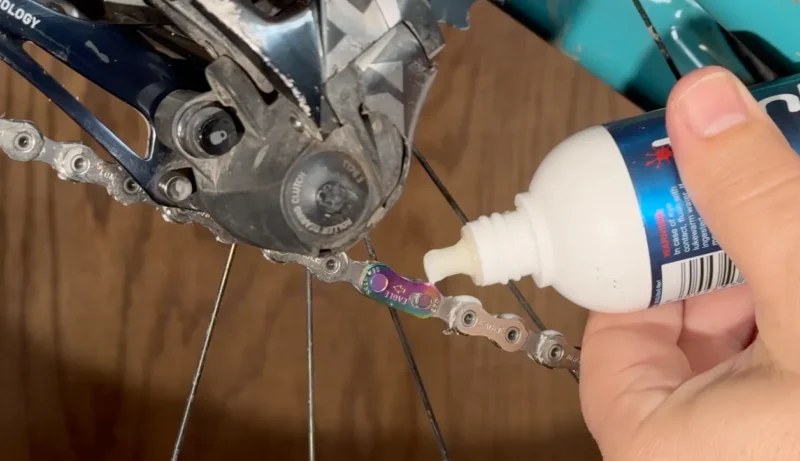
Adding the drip wax is as simple as adding a single drop to the chain, one link at a time.Slowly roll the cranks backwards and start dabbing at the master link – this will give you a reference point for where to stop.
After applying, spin the cranks a bit and then let the lube dry – usually about a half hour.
A common practice is to wax two chains at the same time. It’s pretty simple and prolongs the life of the chain even more.
Keep one as a backup, packed away in a baggie, waiting for its day in the sun. When the time comes, swap them out. At your leisure, recondition the older chain and throw it into the bag for the next rotation.
Tips for a Waxed Chain
- Don’t store a bike with a waxed chain outdoors. Well, don’t store any bike outdoors, especially in wet areas. Water is the enemy! You don’t want rust!
- Use clear wax so you can monitor how dirty it gets over multiple uses. You can also see if any more gunk comes off the chain while waxing.
- The chain hanger I use is made from an old coat hanger, but you can use shift cables, or old spokes. Almost anything will work.
- If powdered lubricants like Tungsten Disulfide or PTFE rub you the wrong way, you don’t need to use them. The wax is the primary lubricant, and the additives only make the action smoother, they don’t extend the life of the application.
That’s all there is to it!
Waxing a chain can be a bit of work at the start, but takes a lot less effort to maintain. Waxed chains stay clean longer and add to the chain’s lifespan.